 Finally, I’ve finished up the entire book of the projects we did this summer. You can download it by clicking on the link: Makers in the Library 2014. It’s a large file, about 9 MB, so be patient!
Enjoy and share alike!

Finally, I’ve finished up the entire book of the projects we did this summer. You can download it by clicking on the link: Makers in the Library 2014. It’s a large file, about 9 MB, so be patient!
Enjoy and share alike!
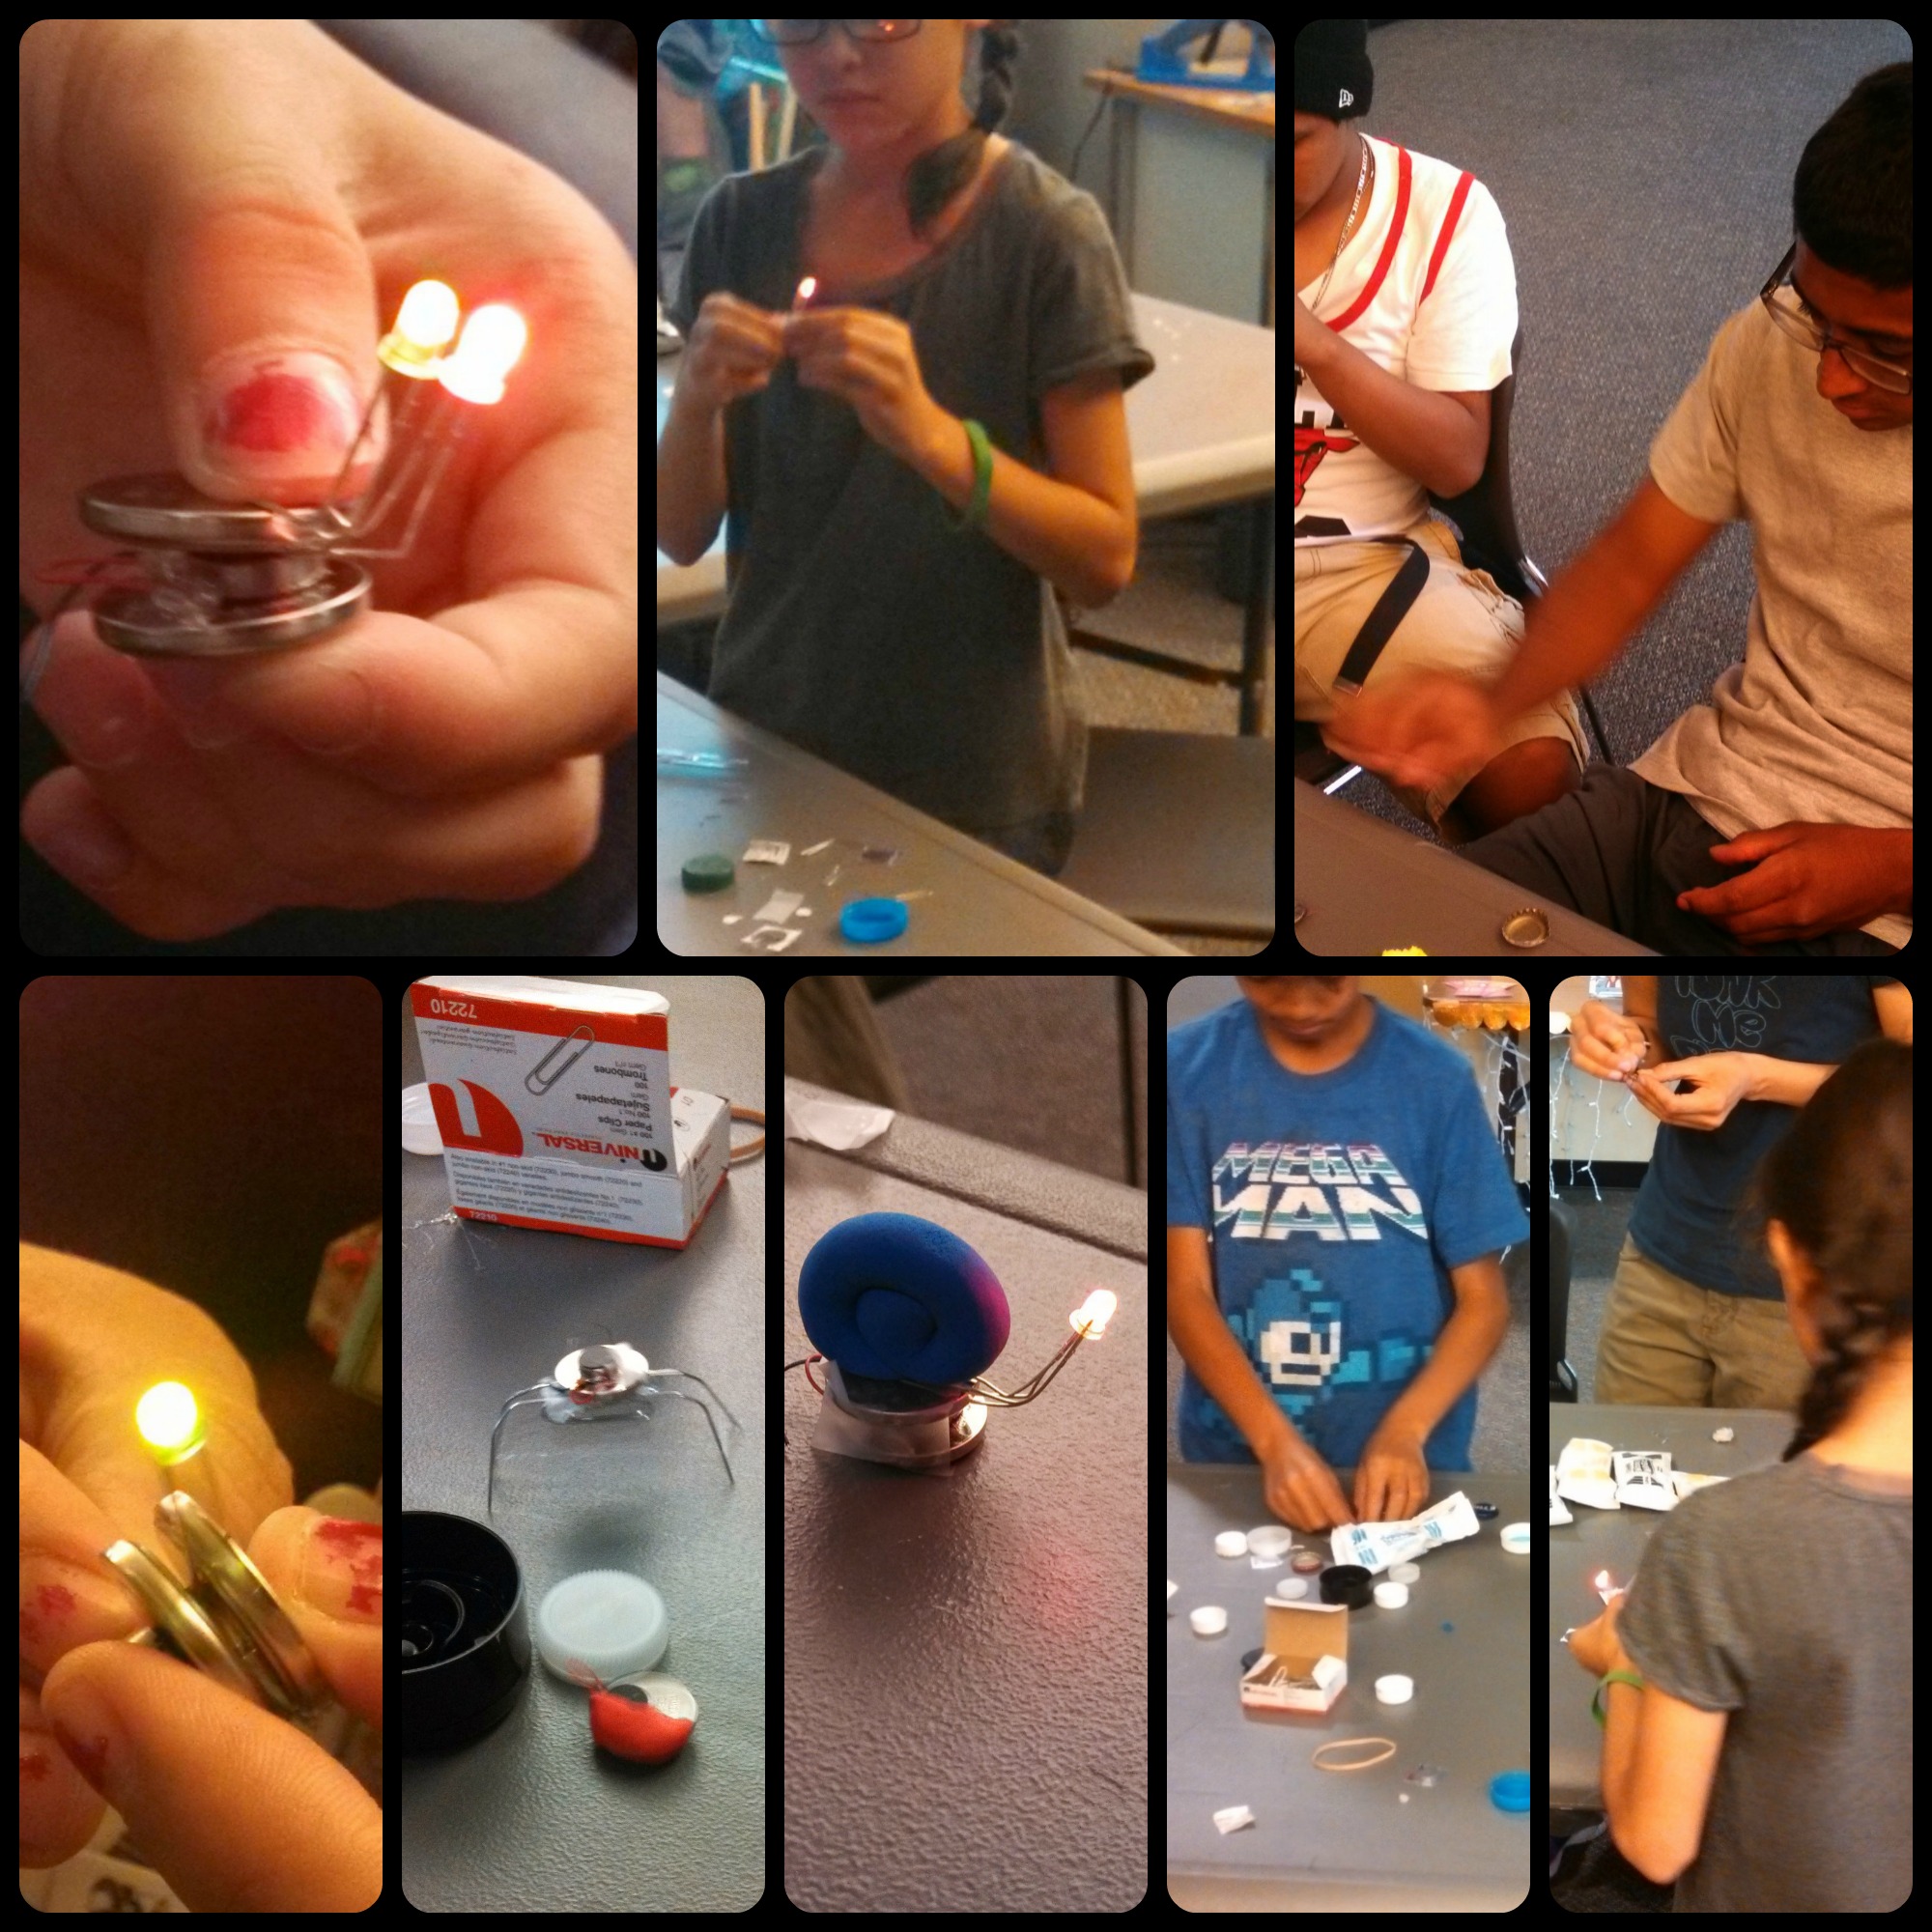
 Yesterday we designed more simple circuits and this time, used conductive thread to create wearable LED creations.
There were 16 participants ranging from pre-teens to young adults. First, we all drew out our ideas and discussed how to build the circuits for the project in the most efficient way. Planning a project is usually the most important step! I went around and helped those who needed help to create the circuit idea. But next time, I think it will be more fun for each of us to share our ideas and discuss together, instead of designing the projects and me privately helping out. That way, the participants can have a chance to show off their cool ideas and we can all troubleshoot and learn to plan together.
I had made a few examples of soft-circuit projects. One was a bracelet, which you can view in my tutorial on how to put together the soft circuits. The other was a badge. The participants made their own creations out of felt and electricity–all of which turned out more beautiful than anything I’d have put together myself! Overall, it was fun to do and a few kids who had never sewn before learned how to sew. I’d love to do this project again!

Sorry for the late post!
Make jewelry and badges that lights up your world! We’ll learn to sew with conductive thread. See you there!

 Yesterday we made vibrobots that also included LED lights. These were tiny little creations based on a great Instructable, “Itty Bitty Vibrobots” by pepik. We took ours in a different direction from the original by adding lights, different kinds of legs and occasionally, pseudo-snail shells! In the sense that a robot is a thing that responds to stimuli, these “robots” respond only by bumping into objects and changing direction because of the vibrating action of the motor–it’s a stretch to call them true robots: so they’re really only vibrobots.
There were 17 participants ranging from pre-teens to young adults. A few Children’s staff in the library watched and created their own, too and commented that this project might work for younger kids.
The vibrobot is made up of a cell-type battery (3 volts) and a cell phone vibrating motor. The motor already comes with wires attached. The motor also has an adhesive that can be used to stick it right to the battery itself. We placed one lead from the motor to the positive side of the battery and another to the negative side. This creates another simple circuit. If you tack down one lead (either with glue, clay or tape) and leave the other open until you are ready to have your robot move, you’ve created a super-primitive switch. The robot won’t start moving until you close the circuit and touch the other wire to the battery. The movement itself comes from the vibration of the motor. Some robots spun in circles, others moved forward in a jittery motion.
Some difficulties that we had were because of connection issues with the wires. The non-insulated ends of the motor wires were very difficult to close a connection. This led to a lot of trial and error while we troubleshooted what was wrong with the connections and how to fix them. (A really good fix was found later in the program and I’m going to use that the next time we work with these motors!)
After the connections were secure, the participants went wild creating interesting and unique robot configurations! Check out the snail and the crab-like robots in the collage!
Download Instructions: Vibrobot instructions
 Yesterday, we started out with our Makers in the Library programs by making the origami tea light.
We warmed up by creating makerspace passports. These are little books that you can make to keep track of what you’ve learned and what makerspaces you’ve been to.
There were 18 participants ranging from pre-teens to young adults. I even had a library staff member watch and make a tea light. We started with the “easy” part of the project: the circuit. The simple circuit is made with an LED light, a resistor and a battery. We used tape to keep the circuit closed. Everyone learned about polarity, what a resistor does and whey resistors are important parts of circuits. By the time we finished our simple circuits, everyone shared that they felt confident making these on their own! Yay!
The hard part was the origami. It was a challenge, but we all helped each other create the origami vase: those who caught on faster, helped the others. At the end, one participant taught us how to make origami hearts. Then, someone had the idea to put a light into the origami hearts. This is what I love about Makerspaces: when others share their knowledge and build on the original idea to create something new and uniquely theirs.

 I was lucky enough to have a
 victim volunteer during Tech Club today who worked on the simple version of the Origami Tea Light project that we’re doing this summer.
The project involves creating a paper container to hold a simple-circuit “tea light” made out of an LED, a resistor and a battery.
Everything worked great and was a lot of fun!
(Instructions on how to do this project will follow soon!)
